Better photos
How to photograph birds for identification
Birds can change position before a camera has focused, and a bright sky or busy branch can hide a useful outline. A strong identification photo is usually the result of small choices about where you stand, how the light falls, and when you press the shutter. This guide covers those capture choices; for help reading visible bird marks after the photo is made, see the related guide to bird field marks.
Quick answer
Choose a clear, naturally lit view from a respectful position. Keep the bird fully in frame, focus on the bird rather than the background, and take a short sequence only if it does not change the bird’s behavior. Review the originals and choose the sharpest frame for analysis.
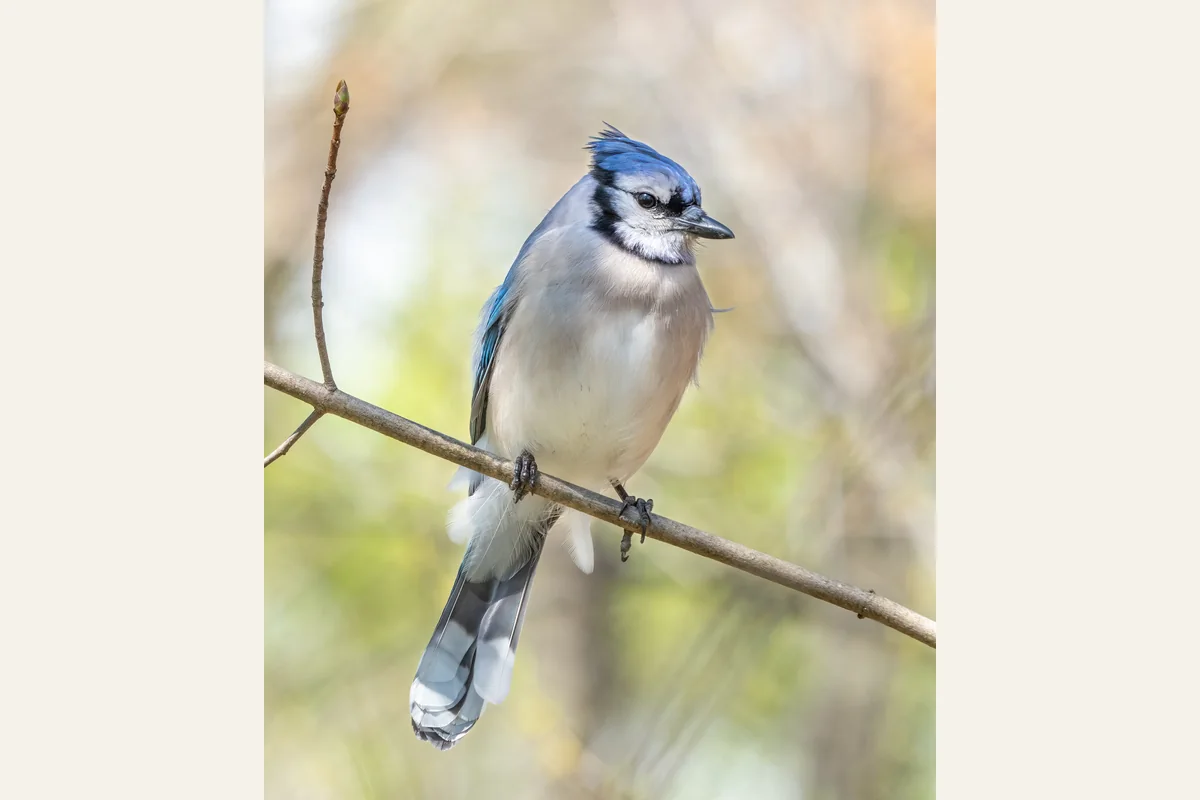
Work with the light
Before zooming in, notice where the brightest light is coming from. Light behind and a little to one side of you can show the bird against its setting; a bright sky behind a darker bird may instead leave the subject as a silhouette. Cornell’s bird-photography guide notes how light direction and strength change the look of a photograph. Backlight can still make an intentional silhouette, but it may hide the details you need to compare.
If the image looks too contrasty, try a different position or wait for softer light. Check the saved frame for washed-out pale areas and deep shadows. A screen preview can look brighter than the file, so inspect the original before deciding which details are actually recorded.
Sources: Cornell Lab of Ornithology, All About Birds — Bird Photography: 5 Steps To Help You Get Started
Find a clean, useful view
Start with a frame that keeps the whole bird and some breathing room around it. A side-on perch or a slight three-quarter view often gives a clean outline; choose whichever angle is naturally available rather than trying to make the bird turn. Leave space in front of a bird that is facing or moving in that direction, and check that a branch or feeder edge does not merge with the outline.
Change your own position a little to simplify the background or reduce overlap. Do not approach, call, bait, or flush a bird to improve composition. If it moves away or changes its behavior in response to you, stop and give it space. A wider, unobstructed photograph is more useful than a close frame made by disturbing the subject.
Sources: Cornell Lab of Ornithology, All About Birds — Bird Photography: 5 Steps To Help You Get Started · U.S. Fish & Wildlife Service — Wildlife Photography Tips
Put focus on the bird
On a phone, tap the bird on screen when the camera keeps choosing the background. With a camera, use a focus point or area that can stay on the bird; exact controls vary, so use the setting you can manage reliably. Brace your arms or rest them on a stable support when that is practical and permitted. Check whether the bird’s outline is sharp in the saved image, not just whether the background looks crisp.
A longer zoom can make hand movement more visible, and a moving bird can blur even when the camera is steady. If the result is soft, change one thing at a time: steady the camera, refocus, or wait for a pause. A larger crop cannot restore detail that the lens did not resolve.
Sources: Cornell Lab of Ornithology, All About Birds — Bird Photography: 5 Steps To Help You Get Started · Nikon USA — Taking Better Pictures of Animals at the Zoo
Wait, then choose the sharpest frame
When the bird is settled and your position is safe, wait for a natural pause and take a short sequence rather than rapidly firing without checking. A small head turn or a moment without motion may give you a cleaner view, but you do not need to direct the bird. Review several frames at the same zoom level and compare edge sharpness, blur, glare, and whether the whole subject remains visible.
Keep the original sequence in your own photo library and select one frame for Animal Says Hi, which analyzes one chosen image at a time. The sequence is a way for you to choose among photographs, not a multi-image submission. Cornell’s guidance emphasizes patience and experimenting with position and framing; keep the process quiet and stop if your presence affects the bird.
Sources: Cornell Lab of Ornithology, All About Birds — Bird Photography: 5 Steps To Help You Get Started · Animal Says Hi Help — Using photo analysis and understanding results
Keep capture notes separate from the bird’s marks
A useful photo records what the camera saw; a field note can separately record the broad place, date, and conditions if you know them. Do not let an expected species or a remembered location change what the pixels show. Animal Says Hi accepts one selected photo and optional free-text context, not a set of photographs or structured date and location fields.
After choosing a frame, use the related bird-field-marks guide to compare visible details with a regional bird reference. If light, distance, or blur hides the distinction, keep the result broad and try again only if another view is available without disturbing the bird. An AI suggestion is a lead to check, not independent evidence or a verified record.
Sources: Animal Says Hi Help — Using photo analysis and understanding results · iNaturalist Help — What is an Identification?
Bird photo review
| Capture check | Look at the saved frame | If it needs work |
|---|---|---|
| Light | The bird is not lost against glare or a bright sky. | Change your position or wait for softer light. |
| Frame | The whole bird is visible against a simple background. | Widen the frame or choose a clearer view. |
| Focus | The bird’s outline is sharper than the background. | Steady the camera and refocus. |
| Timing | One frame in the short sequence is clear and still. | Wait quietly for a natural pause. |
| Submission | One original frame is selected for analysis. | Keep other views in your own library. |
- Capture check
- Light
- Look at the saved frame
- The bird is not lost against glare or a bright sky.
- If it needs work
- Change your position or wait for softer light.
- Capture check
- Frame
- Look at the saved frame
- The whole bird is visible against a simple background.
- If it needs work
- Widen the frame or choose a clearer view.
- Capture check
- Focus
- Look at the saved frame
- The bird’s outline is sharper than the background.
- If it needs work
- Steady the camera and refocus.
- Capture check
- Timing
- Look at the saved frame
- One frame in the short sequence is clear and still.
- If it needs work
- Wait quietly for a natural pause.
- Capture check
- Submission
- Look at the saved frame
- One original frame is selected for analysis.
- If it needs work
- Keep other views in your own library.
Use separate field notes for date or place. Animal Says Hi analyzes one selected photo at a time.
Takeaways
- Check light direction and background before zooming in.
- Keep a clean, whole-subject view and focus on the bird, not the scene behind it.
- Wait for a natural pause, review a short sequence, and submit only the clearest single frame.
Sources and further reading
Sources checked 17 Oct 2026.
- Cornell Lab of Ornithology, All About Birds — Bird Photography: 5 Steps To Help You Get Started
- U.S. Fish & Wildlife Service — Wildlife Photography Tips
- iNaturalist Help — What is an Identification?
- Animal Says Hi Help — Using photo analysis and understanding results
- Nikon USA — Taking Better Pictures of Animals at the Zoo
Have a photo of your own?
Choose a photo on Home and select Analyze — your photo is sent only when you ask for the analysis.
Discover an animal